
This article proposes step-by-step procedures to facilitate how a store is created from scratch in WooCommerce. For the sake of this report, the creation of a digital eBook will be targeted. On completion of this process described herein, it is relatively easy to add other categories of products afterwards. Let’s get started.
Step 1: Install the WooCommerce Plugin
In cases where users signed up for hosting services that do include WooCommerce, the plugin most likely comes automatically installed. Alternatively, if using a different type of hosting company and installing WordPress manually, you’ll need to separately install the WooCommerce plugin.
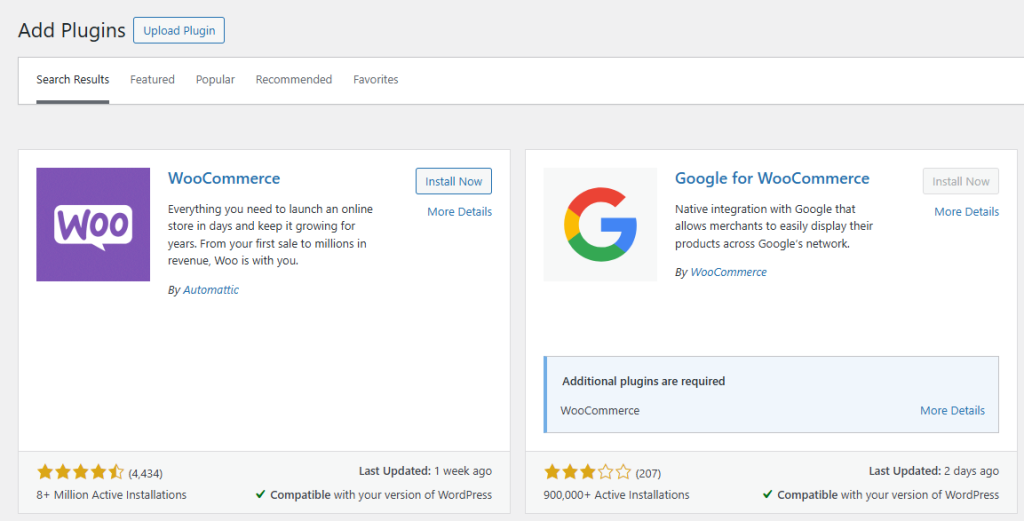
This is simply to install and activate it, and get up and running.
Step 2: Setup Your Store
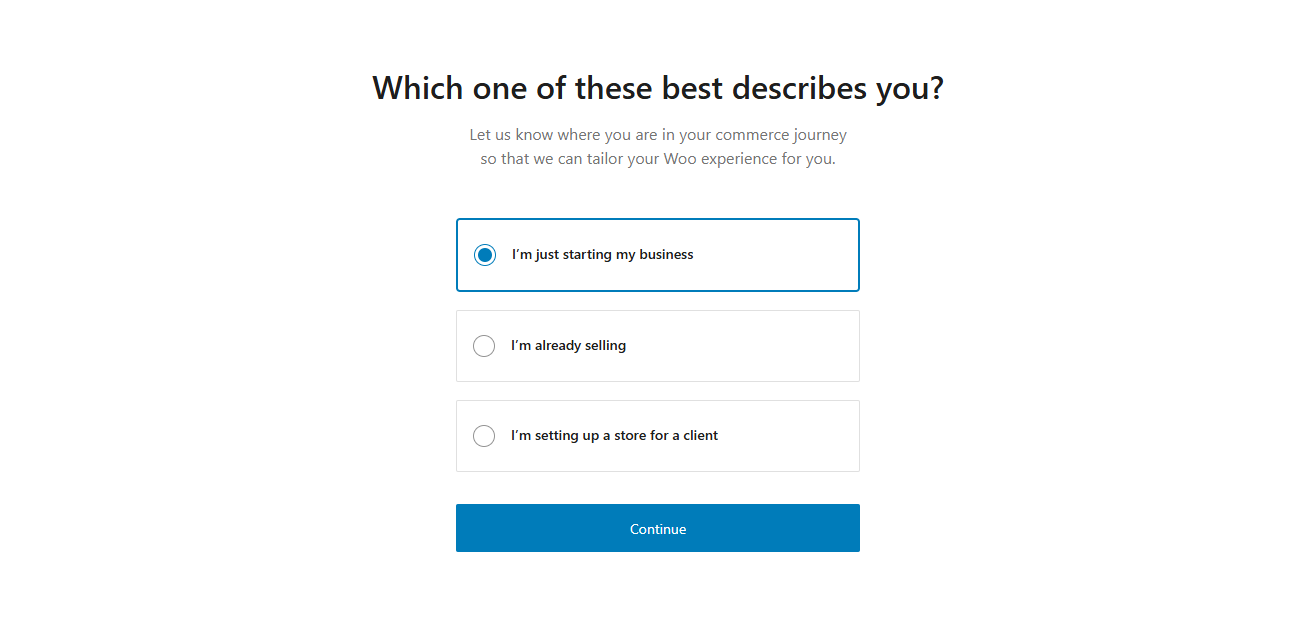
Upon plugin activation, it will provide multiple questions which lead toward successful store setup configurations. It plays an important part as this initiates the store configuration, hence what type of shop you plan on building.
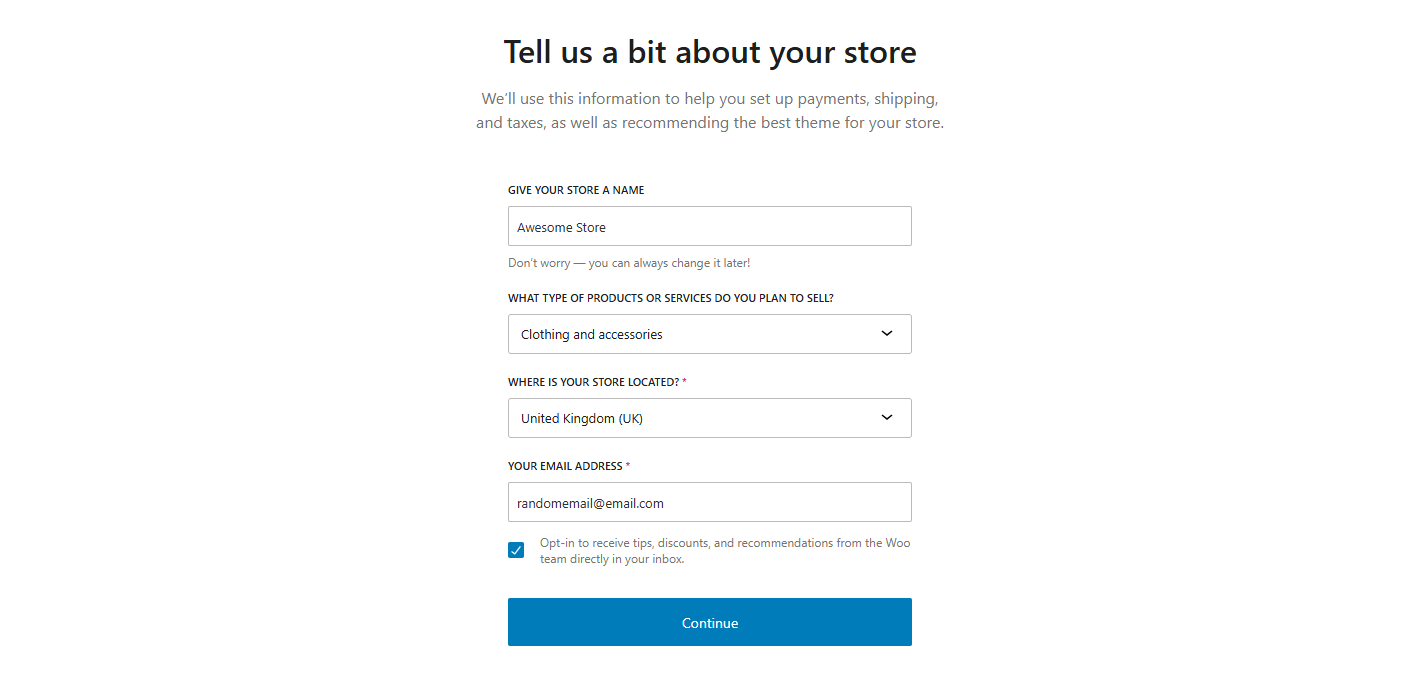
First, fill out your email address, location, and other fundamental information:
Next, select the industry your store belongs to. Since we’re selling a digital book, you can choose “Other” and type “Books.” Click “Continue,” and then choose the types of products your store will offer.
One can also opt for physical or intangible products. As for downloadable products like eBooks, the free option will be more suitable. Other types of products, like membership or reservation, are available too, but these will incur additional charges.
Step 3: Choose the Options You Wish to Activate
Then comes the request for you to determine the functionalities of your store from a set menu. For example, you will need a way for customers to pay, and there’s a feature in WooCommerce that calculates taxes based on your location. Look through the available features and choose the ones that your store will need to succeed.
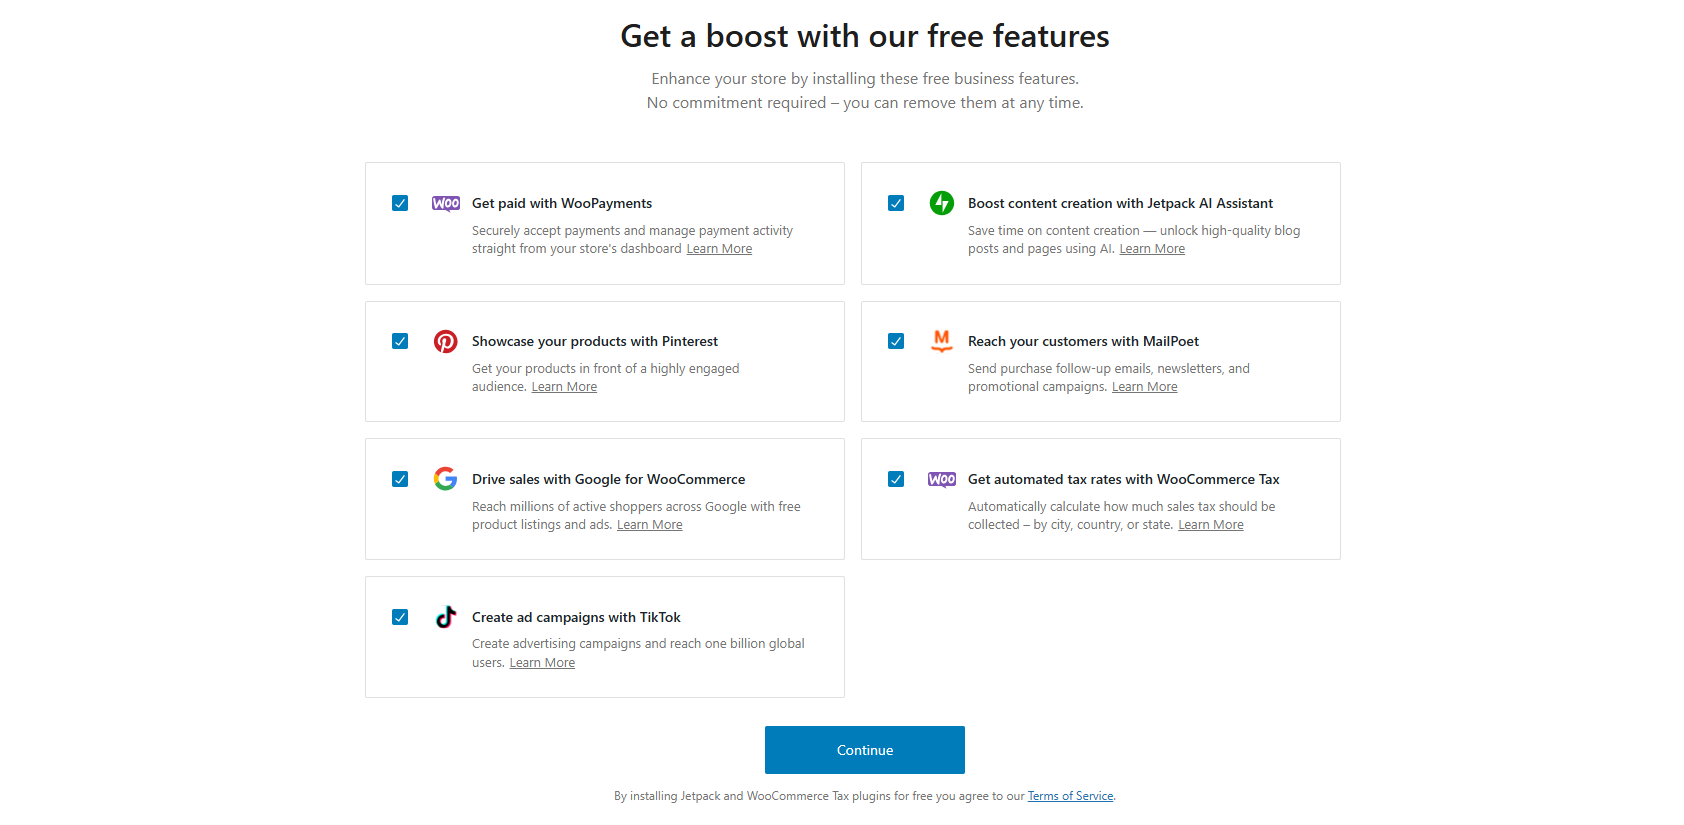
This is the last stage of configuration before selection of a theme to give your store a professional look and feel.
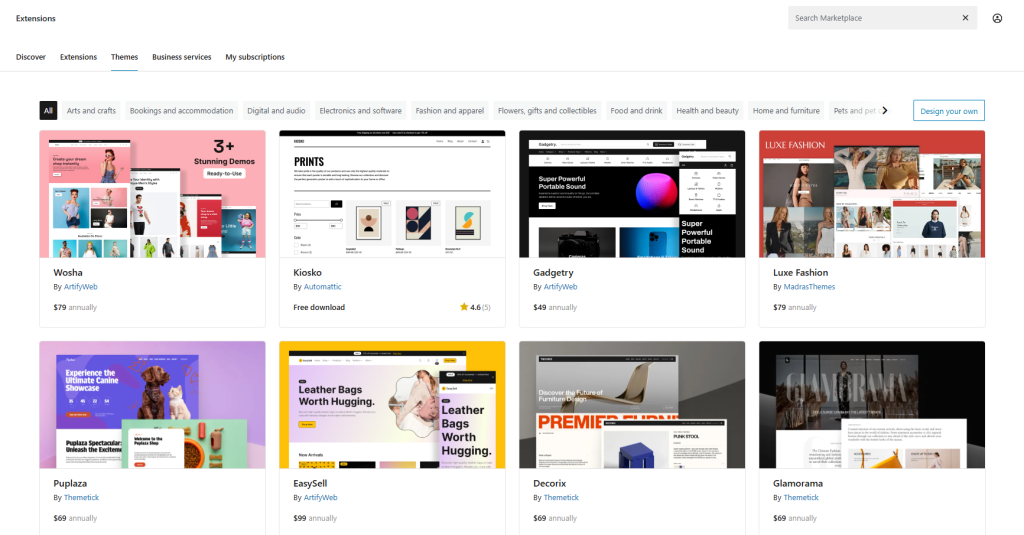
Step 4: Theme Selection for Shop
WooCommerce offers free and paid themes, or you could use the one you already have. A really popular free one is the Storefront theme which plays well with WooCommerce. Choose whatever will appeal to your eye or budget for your store so that it’ll be unique from others.
Step 5: Jetpack Integration for Backups
In order to finish the installation or activate some of the features, WooCommerce will prompt you to connect your store with Jetpack. Jetpack is a free integration that gives you easy backups and improves the security of your site.
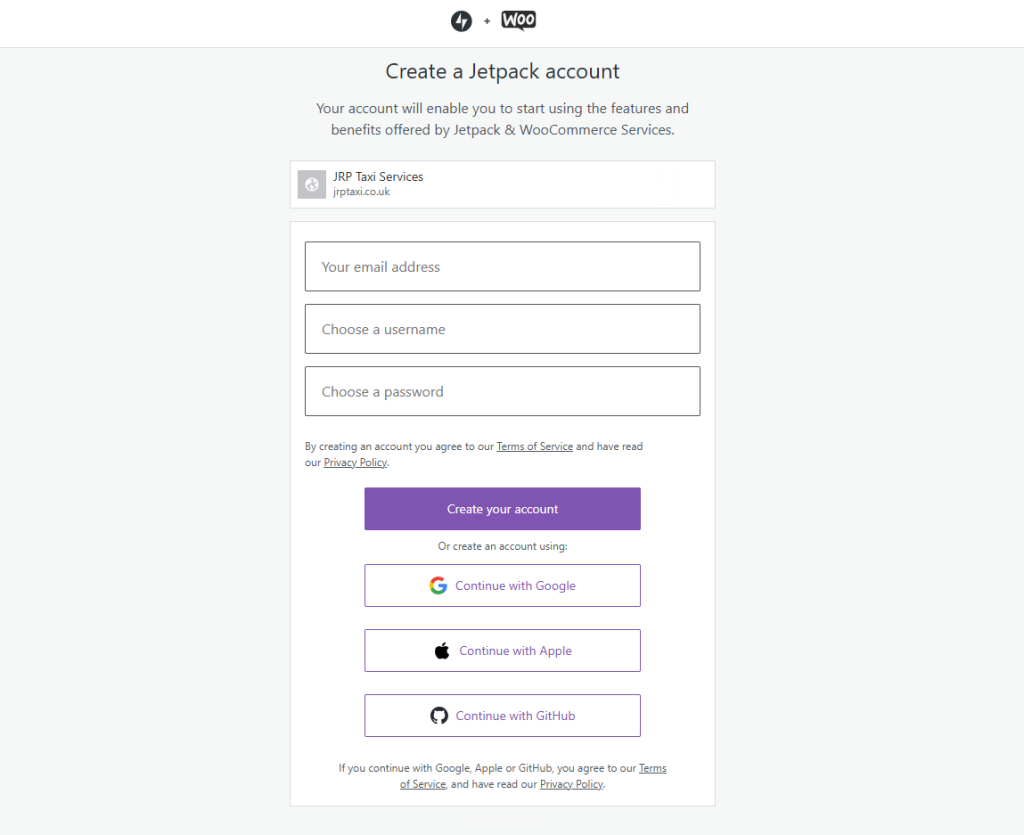
If you have an existing Jetpack account, log in. Otherwise, sign up for a new account to continue.
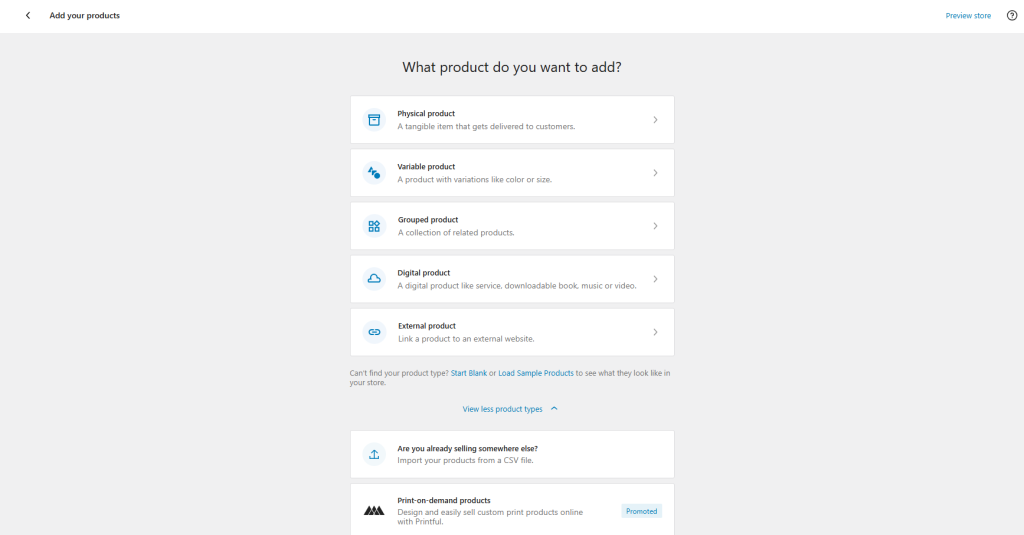
Step 6: Create Your First Product
Now, let’s add your first product. Click on “Add Products” in the WooCommerce dashboard, and choose the category for the product that you are going to sell. For a digital product like an eBook, select “Digital product.”
You are prompted to use the product editor, which is the same thing as the post editor of WordPress. There is also a guide for the very first time users who access it, so just setup your product description and attributes. Just fill in the requirements concerning the name of the product, the description, and the price for the product you are working with.
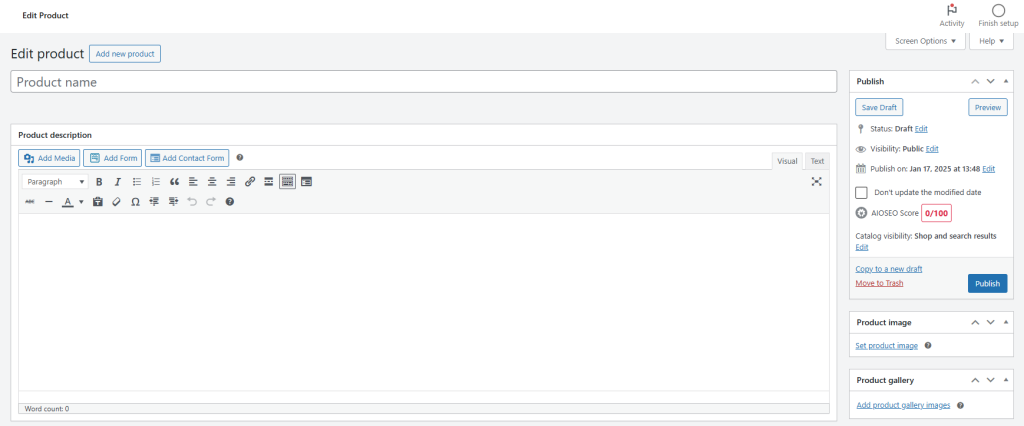
Because it is a digital product, the file that customers will download after they purchase can be uploaded. There are so many attributes that can be defined within the Product configuration options, but to accelerate the process of creating your store we will work with the most basic attributes.
Once your product is ready, save and publish it. You’ll have a fully functional product page, similar to any other online store. Customers can add the product to their cart, read the description, check feedback, and then proceed to checkout.
Step 7: Payment Gateways Setup
To enable the processing of payments, WooCommerce will recommend Stripe as the default. However, if you wish to use PayPal — something many customers are familiar with — you can easily add that as well. Also, PayPal allows customers to pay with credit or debit cards.
In order to configure PayPal, navigate to the settings within WooCommerce, click on “Set up additional payment options,” and choose PayPal as your selected method. WooCommerce will proceed to install the requisite plugin, and you can enable PayPal by signing into your PayPal account.
Following this setup, PayPal will become available for all transactions conducted by customers.
Further Configuration Alternatives within WooCommerce
WooCommerce is a very versatile plugin which can support a variety of store types, such as subscription-based businesses and even inventory-based products that must be shipped. The setup process covers the basic issues; however, WooCommerce offers an enormous number of additional functionality that can be explored after your store is launched.
Depending on the features you want, you may need to subscribe to the paid plans, but the free version of WooCommerce is strong enough for many store owners. You could test the extra features as your business grows to improve your store’s offering.
These procedures ensure that a totally functional WooCommerce store is built. As much as one uses these functionalities, the more numerous opportunities become for customizing the store according to specific needs and really personalizing it.