

Introduction
Deploying a Next.js application on cPanel can seem like a daunting task, especially if you’re unfamiliar with either platform. However, with the right approach, you can take advantage of cPanel’s intuitive tools and Next.js’s powerful features to create and host high-performance applications.
In this guide, we’ll walk you through a simple, step-by-step process to help you deploy your Next.js application on cPanel efficiently and effectively. Whether you’re a seasoned developer or just starting, this guide is designed to simplify the deployment process for you.
Understanding the Basics: What Are cPanel and Next.js?
What Is cPanel?
cPanel is a web hosting control panel designed to simplify server management. It provides intuitive tools like File Manager, Database Manager, Domain Manager, and CMS installers, making server operations efficient and user-friendly.
What Is Next.js?
Next.js is a robust React.js-based framework that enables server-side rendering (SSR) and static site generation (SSG). It allows developers to create SEO-friendly, high-performance applications that go beyond traditional single-page applications (SPA).
Step-by-Step Guide to Deploy a Next.js App on cPanel
1. Build a Custom Server for Your Next.js Application
Begin by creating a custom server to handle your Next.js application:
- Create a file named
server.jsin the root directory of your project. - Add the following code:
const { createServer } = require('http');
const { parse } = require('url');
const next = require('next');

const dev = process.env.NODE_ENV !== 'production';
const hostname = 'localhost';
const port = 3000;

const app = next({ dev, hostname, port });
const handle = app.getRequestHandler();

app.prepare().then(() => {
  createServer(async (req, res) => {
    try {
      const parsedUrl = parse(req.url, true);
      const { pathname, query } = parsedUrl;

      if (pathname === '/a') {
        await app.render(req, res, '/a', query);
      } else if (pathname === '/b') {
        await app.render(req, res, '/b', query);
      } else {
        await handle(req, res, parsedUrl);
      }
    } catch (err) {
      console.error('Error handling request', req.url, err);
      res.statusCode = 500;
      res.end('Internal Server Error');
    }
  })
    .once('error', (err) => {
      console.error(err);
      process.exit(1);
    })
    .listen(port, () => {
      console.log(`> Ready on http://${hostname}:${port}`);
    });
});
2. Configure Your Project for Production
Update your package.json file to include a script for starting your server in production mode:
{
  "scripts": {
    "start": "NODE_ENV=production node server.js"
  }
}
3. Build the Application for Deployment
Use the following command to build your application:
npm run buildAlternatively, for Yarn users:
yarn build4. Prepare Your Project Files
- Navigate to your project folder and locate the necessary files.
- Exclude unnecessary files and folders such as
node_modules,.git,README.md, and.gitignore. - Compress the remaining files into a ZIP archive.
5. Upload Files to Your cPanel Account
- Log in to your cPanel account.
- Access the File Manager and navigate to the root directory of your domain.
- Upload and extract the ZIP archive.
6. Configure the Node.js Application in cPanel
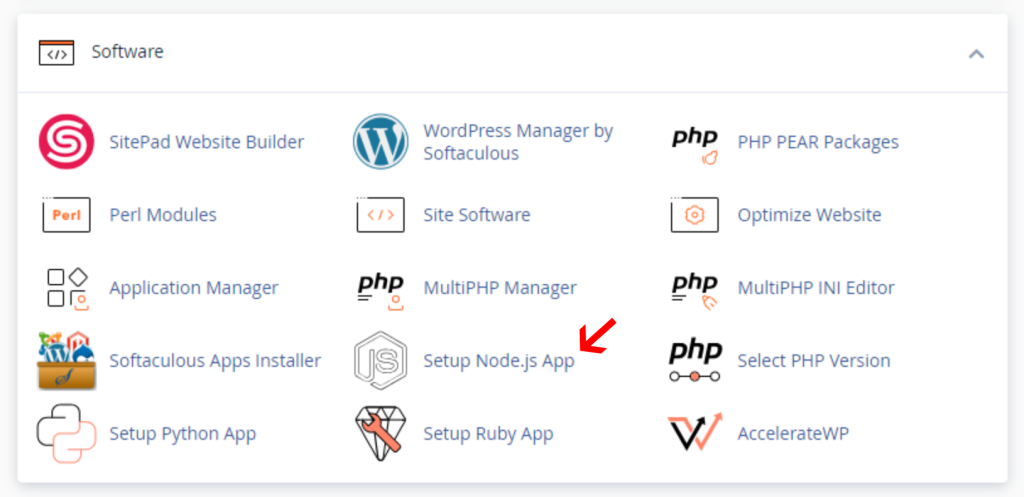
- Go to the Software section in cPanel and select Setup Node.js App.
- Click the Create Application button.

- Set up the application by configuring the following:
- Node.js Version: Ensure it matches your project requirements.
- Application Mode: Select “Production.”
- Application Root: Specify your domain’s root directory.
- Application URL: Enter your domain name.
- Startup File: Set this to
server.js.
Once completed, click Create to initialize your application.
7. Install Dependencies and Launch the App
- Scroll down to the Detected Configuration Files section.
- Click Run NPM Install to install the required packages.
- Once the installation is complete, click Start App to launch your application.
Verifying the Deployment
Open your domain name in a web browser to check if your Next.js application is live. If configured correctly, your app will be fully functional and accessible.
Conclusion
Congratulations! By following this guide, you’ve successfully deployed your Next.js application on cPanel. This combination of technologies allows you to deliver fast, dynamic, and scalable applications while leveraging cPanel’s user-friendly hosting environment.
Should you encounter any issues, revisit the steps or consult the resources provided to troubleshoot effectively. Deploying applications doesn’t have to be complicated, and with practice, it becomes second nature. Happy hosting!